We need to clean and maintain cafe equipment regularly (daily, weekly, monthly and quarterly). The maintenance content of each stage is different.
Coffee machine
- Maintenance standards:
- Clean the brewing head
Frequency: three times a day (after the peak of operation in the morning, noon, and evening)
Tools: non-porous filter screen
Steps:
1. Put the handle with the non-porous filter into a brewing head.
2. Press the continuous water outlet button. After six seconds, press the button again to close the brewing head. After stopping for 6 seconds, press the continuous water outlet button again and repeat this step six times.
3. Repeat steps 1 to 2 for the remaining brewing heads.
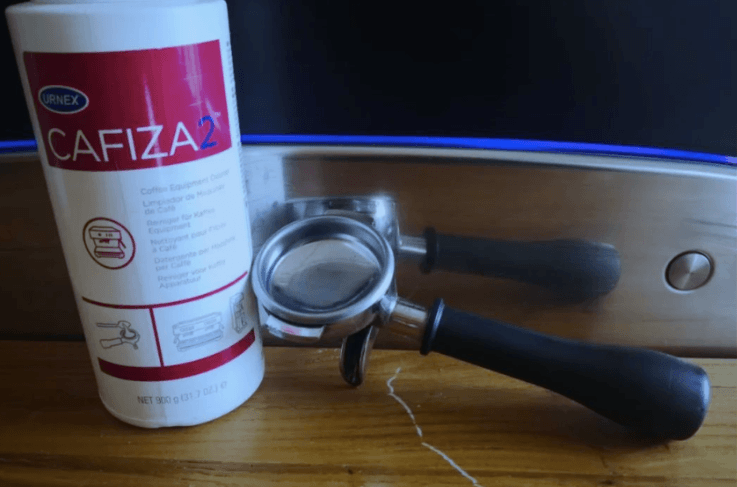
- Clean the brewing head with coffee cleaning powder
Frequency: every night when the shop is closed
Tools: non-porous filter screen, coffee cleaning powder
Steps:
1. Put 1/4 teaspoon of coffee cleaning powder into the handle of the non-porous filter.
2. Put the handle of the non-porous filter into a brewing head.
3. Press the continuous water outlet button. After six seconds, press the button again to close the brewing head. After stopping for 6 seconds, press the continuous water outlet button again and repeat this step six times.
4. Remove the handle of the non-porous filter screen and rinse it with hot water.
5. Put the handle of the non-porous filter back into the brewing head.
6. Repeat step 3 six times.
7. Repeat steps 1 to 6 for the remaining brewing heads.
- Clean the brewing head filter
Frequency: All brewing heads once a week
Tool: short flat-blade screwdriver, trapper, nylon brush, scouring pad, coffee cleaning powder, cup
Note: Don’t use a brewing head without a filter to make coffee. This may cause serious damage to the coffee machine.
Steps:
1. Use a short flat-blade screwdriver to remove the screw of the brewing head filter in a counterclockwise direction. If the screw is too tight, use an adjustable wrench to loosen the screw. Put the removed screws in the cup to avoid losing them.
2. Check whether the filter and screws are worn. If the metal mesh is worn or comes off the stainless steel backing, discard the filter and replace it with a new one.
3. Use a scouring pad to clean the brewing head.
4. Use a nylon brush to clean around the sealing ring.
5. Use a wet towel to wipe the brewing head and sealing ring.
6. Put the removed filter and screws into a cup filled with hot water, add a teaspoon of coffee cleaning powder, let it soak for half an hour, and then clean the filter with a scouring pad and a nylon brush.
7. Install the filter screen and screws on the brewing head, and use a short flat-blade screwdriver to tighten the screws in a clockwise direction.
8. Repeat steps 1 to 7 for other brewing heads.

Grinder
- Maintenance standards:
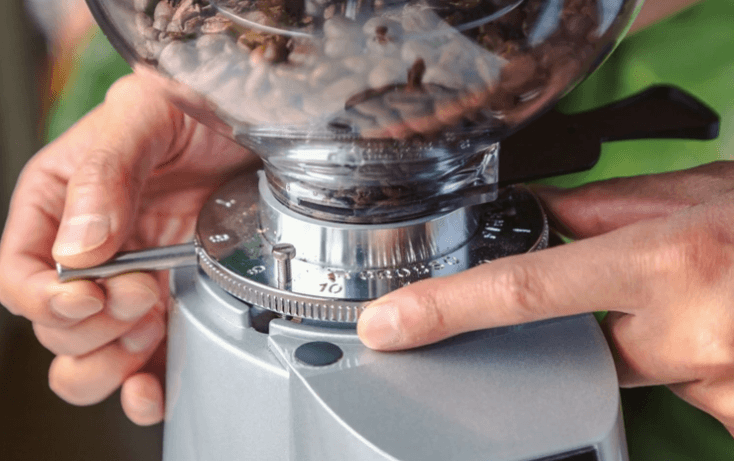
- Check/adjust grinding
Frequency: every half an hour
Tools: digital timer
Steps:
1. Press the double button to take 16 grams of coffee powder and fill it into the double cup handle. After ramming it, put it in the brewing head to make double espresso. The brewing time is 20-28 seconds.
2. Adjust the grinding to meet the standard:
If the brewing is too fast (less than 20 seconds), adjust the grinding adjustment ring counterclockwise toward the “thin” direction one notch at a time to make the grinding finer.
If the brewing is too slow (more than 28 seconds), adjust the grinding adjustment ring clockwise toward the “coarse” direction one notch at a time to make the grinding coarser.
3. Repeat steps 1 and 2 until the standard is reached.
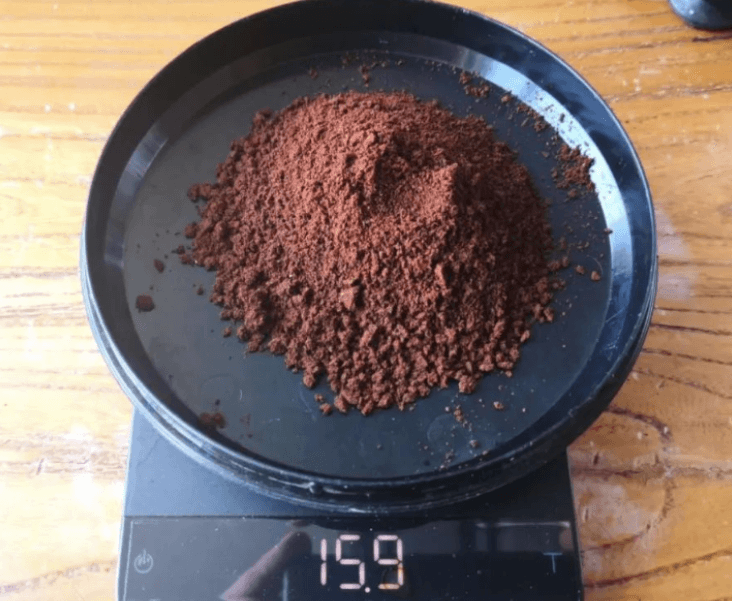
- Check/adjust powder amount
Frequency: Every morning
Tools: electronic scale
Steps:
1. Put the top cover of the coffee bean bin on the electronic scale, press the “Tare” button on the electronic scale, and the electronic scale will read “zero” at this time.
2. Take a double cup of coffee powder and put it on the lid of the coffee bean bin, and put the lid on the electronic scale.
3. The powder quantity is compared with the standard. Measure twice to check the accuracy of the powder amount.
4. If the weight does not meet the standard, the grinder needs to be adjusted.
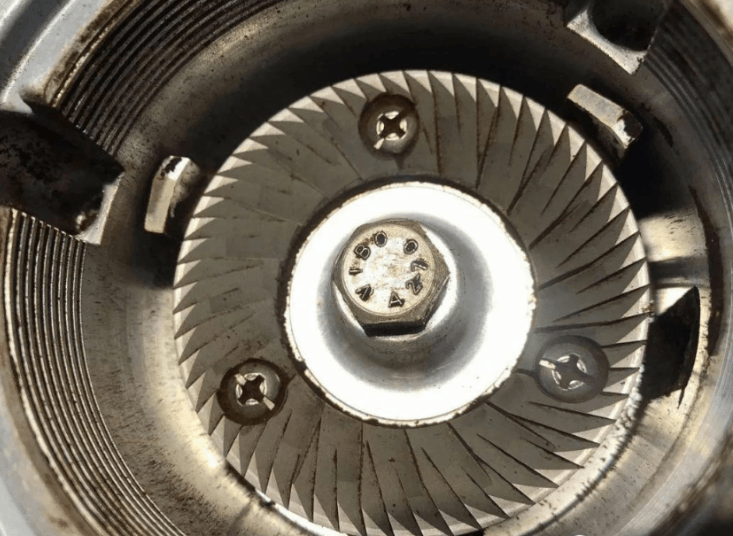
- Clean the grinding disc
Frequency: monthly
Tools: vacuum cleaner, brush, food grade lubricant, cup
Steps:
1. Close the outlet of the coffee bean bin, turn on the grinder to grind off the remaining coffee beans until the grinder emits an idling sound, turn off the grinder, and remove the coffee bean funnel.
2. Turn off the power supply of the grinder.
3. Write down the current setting of the grinder, and make a mark on the scale of the adjustment ring.
4. Turn the adjusting ring clockwise until the adjusting ring can be removed.
5. Take the upper grinding disc component out of the grinder.
6. Take out the separation spring of the lower grinding disc. Put all the removed parts in a cup so as not to lose them.
Note: The large grinder has four springs, and the small grinder only has three springs. All springs must be equipped for the grinder to work properly.
7. Use a brush to remove all coffee residues on the blade. Use a vacuum cleaner to remove coffee residues.
8. Use a brush to remove residue from the threads of the adjusting ring.
9. Reinstall the separation spring of the lower grinding disc.
10. Reinstall the upper grinding disc parts.
11. Inject a small amount of lubricant (about half the size of a coffee bean) into the thread of the adjusting ring. Spread the lubricant evenly and use a clean and dry towel to wipe off the excess lubricant.
12. Rotate counterclockwise to install the adjusting ring.
13. Tighten the adjusting ring until the upper and lower grinding disc blades touch, and then reverse until the grinder is restored to the setting recorded in step 3.
14. Turn on the power supply of the grinder.
15. Inspect and adjust the grinding according to the steps described in the “Check/Adjust Grinding” section.
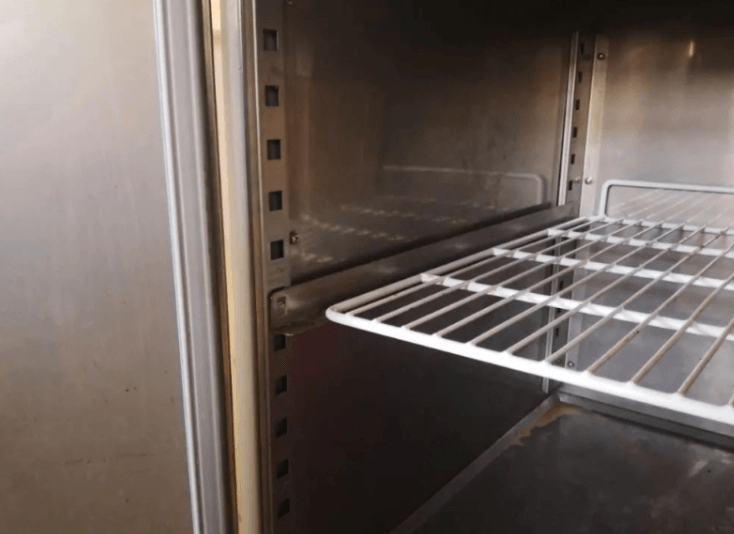
Fridge
- Maintenance standards:

- Empty and clean the fridge
Frequency: weekly
Tools: bucket, towel, disinfectant
Steps:
1. Take out the items from the fridge.
2. Use a towel soaked with disinfectant to thoroughly wipe the inside of the fridge.
3. Use a towel soaked with disinfectant to thoroughly wipe the door and sealing strips.
4. Use a clean and dry towel to wipe excessive moisture.
5. Put the items back in the fridge.
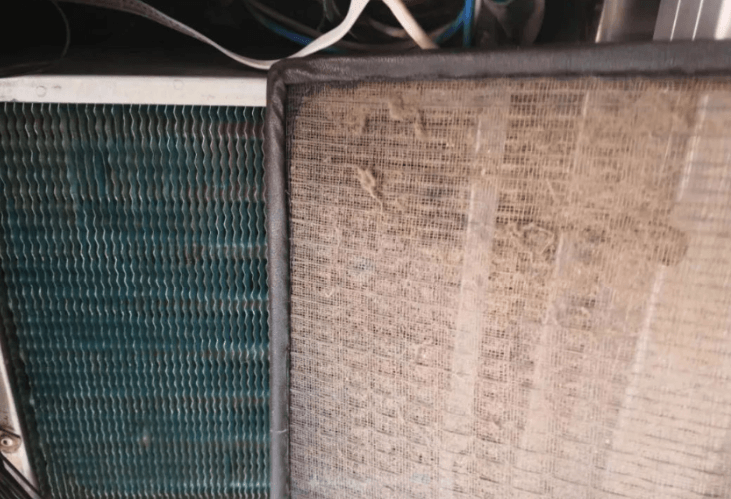
- Clean the cooling fins and filters of the fridge condenser
Frequency: weekly
Tools: vacuum cleaner with brush
Steps:
1. Use a vacuum cleaner with a brush to carefully remove all dust on the condenser fins.
2. Remove the filter, clean it with water, drain it, and reinstall it.
Pastry display cabinet
- Maintenance standards:

- Clean the pastry display cabinet
Frequency: every day
Tools: bucket, towel, disinfectant
Steps:
1. Take out the items from the pastry display cabinet.
2. Use a towel soaked with disinfectant to thoroughly wipe the inside of the pastry display cabinet.
3. Use a towel soaked with disinfectant to thoroughly wipe the door and sealing strips.
4. Use a clean and dry towel to wipe excessive moisture
5. Put the items back in the pastry display cabinet.
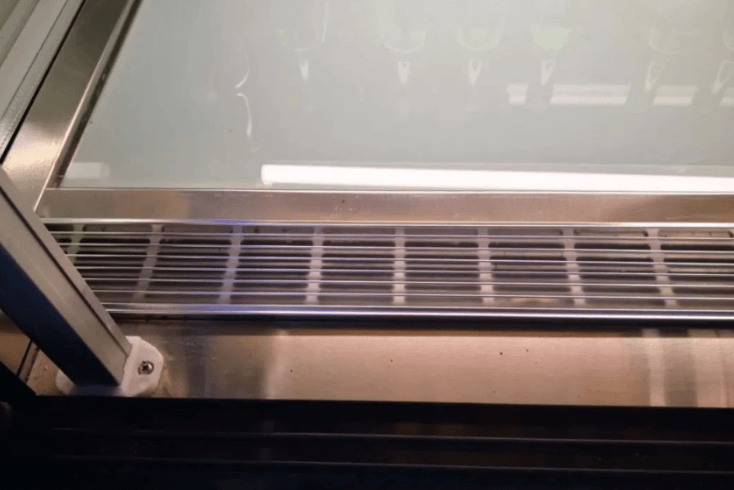
- Clean the condenser radiator and filter of the pastry display cabinet
Frequency: weekly
Tools: vacuum cleaner with brush
Steps:
1. Use a vacuum cleaner with a brush to carefully remove all dust on the condenser fins.
2. Remove the filter, clean it with water, drain it, and reinstall it.

Ice machine
- Maintenance standards:
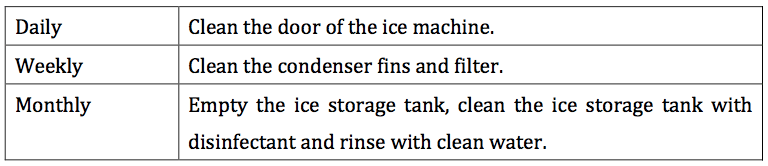
- Clean the door of the ice machine
Frequency: every day
Tools: towels, disinfectant
Steps:
1. Open the lid of the ice machine, and use a towel soaked with disinfectant to thoroughly wipe all surfaces and edges of the lid.
2. Sterilize the rubber door mat of the lid and the edge of the opening of the ice machine.
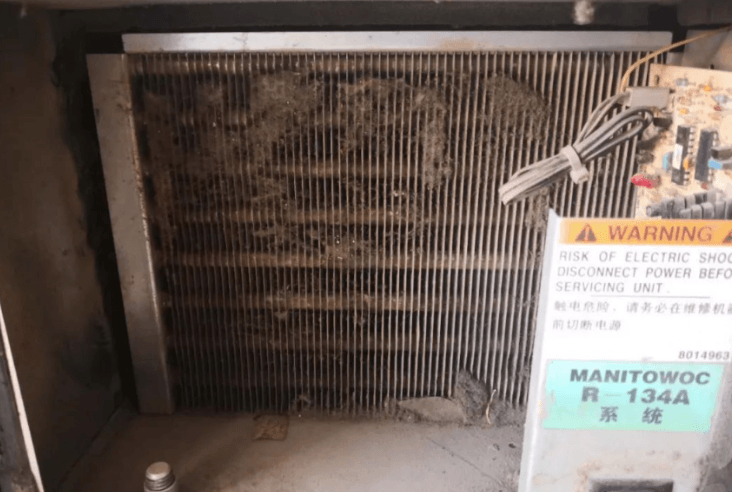
- Clean the cooling fins and filter of the ice machine condenser
Frequency: weekly
Tools: vacuum cleaner with brush
Steps:
1. Use a vacuum cleaner with a brush to carefully remove all dust on the condenser fins.
2. Remove the filter, clean it with water, drain it, and reinstall it.
- Clean the ice storage tank
Frequency: monthly
Tools: ice scoop, bucket, towel, disinfectant
Steps:
1. Turn off the power switch of the ice machine.
2. Take out all the ice and put the removed ice in the sink in the washing room.
3. Wipe the inside of the ice bucket carefully with a towel soaked in disinfectant.
4. Use hot water to carefully clean the inside of the ice storage tank, including all inner surfaces, the inside of the door and the rubber seals around the door.
5. Dry the ice storage tank.
6. Turn on the power of the ice machine.
Note: It takes at least 20 minutes to make the first batch of ice.
Dishwasher
- Maintenance standards:
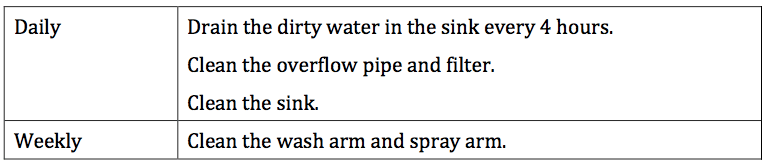
- Clean the filter
Frequency: Daily
Tools: nylon brush
Steps:
1. Turn off the machine and wait for it to complete the drain cycle.
2. Take out the dish rack.
3. Take out the filter from the sink.
4. Clean the filter screen carefully with a brush.
5. Use a wet towel to wipe the inside of the sink.
6. Reinstall the filter.
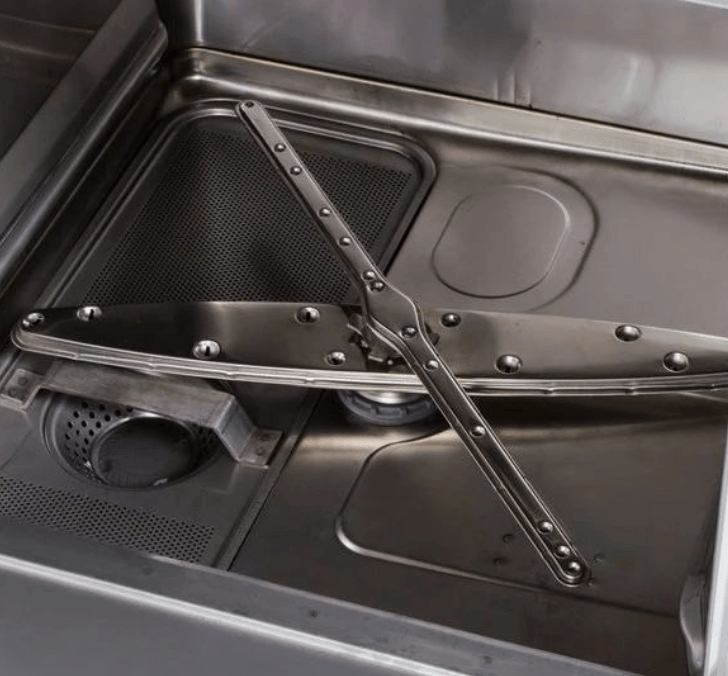
- Clean the spray arm
Frequency: weekly
Tools: pliers, cup
Steps:
1. Turn off the machine and wait for it to complete the drain cycle.
2. Loosen (turn counterclockwise) the upper spray arm fixing knob, and remove the upper spray arm parts.
3. Loosen (turn counterclockwise) the lower spray arm fixing knob, and remove the lower spray arm parts.
4. Clean the parts and the inside of the spray arm.
5. Reinstall the upper and lower spray arms.
6. Tighten (clockwise) the two spray arm fixing knobs.
7. Ensure that the two spray arms can rotate freely.
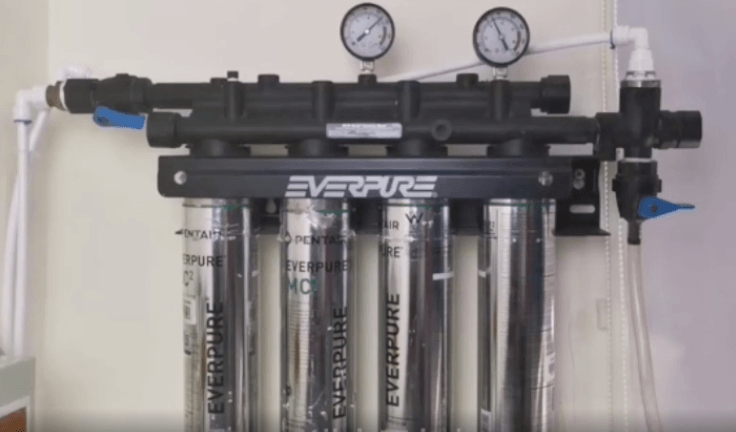
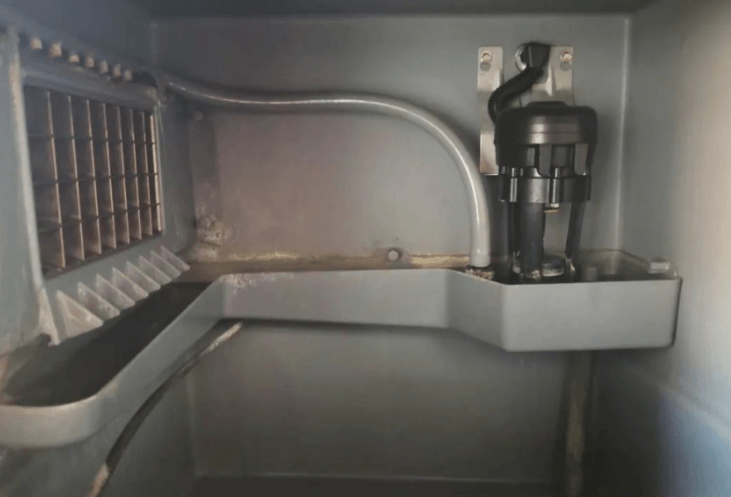
Water filter
- Maintenance standards:
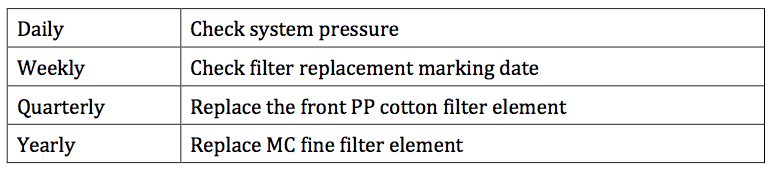
- Check system pressure
Frequency: every day
Tools: none
Steps:
1. Visually check the filter inlet pressure gauge and outlet pressure gauge readings.
2. Compare the reading of the outlet pressure gauge with the reading of the inlet pressure gauge. If the reading differs by 20 PSI, the MC filter element needs to be replaced.
3. If the reading of the water inlet pressure gauge is lower than 20PSI, the front PP cotton filter element needs to be replaced.
- Replace PP cotton filter element
Frequency: every three months or the water inlet pressure gauge reading is lower than 20PSI
Tools: special wrench, new filter element
Steps:
1. Close the water inlet valve and open the drain valve to discharge the pressure.
2. Put the special wrench on the upper part of the blue coarse filter barrel, remove the blue filter barrel counterclockwise, throw away the old filter element inside, and replace with a new filter element.
3. Tighten the filter cartridge in a clockwise direction.
4. Open the water inlet valve, and close the drain valve when water flows out from the drain valve.
5. Paste the replacement date label on the outside of the filter cartridge.
Note: There is an O-ring seal in the blue filter cartridge, do not lose it when disassembling.
- Replace the MC filter element
Frequency: 20PSI per year or pressure gauge reading difference
Tools: new MC filter element
Steps:
1. Close the water inlet valve and open the drain valve to discharge the pressure.
2. Remove the MC filter element in a counterclockwise direction, throw away the old filter element, and replace with a new one.
3. Tighten the new MC filter element in a clockwise direction.
4. Open the water inlet valve and let the water continue to flow out of the drain valve for fifteen minutes, then close the drain valve.
Note: This process is very important. If the water cannot be allowed to flow continuously for fifteen minutes, the MC filter element will not work.
5. Paste the replacement date label on the outside of the MC filter element.